Monday, September 08, 2008

What Beethoven Thinks of the Move...

Maybe if I lie here wallowing… she’ll put everything back where it belongs…


Wallow… Wallow… Wallow…

Oh crap--- is that Fancy Feast?!?…

Thursday, August 28, 2008

Baby Mary Janes


Ok -- I was wrong. I have another post before the move :o)

In February, I posted some baby items that I made for my future niece who was due in March. She took her time and arrived on April 1st, an April Fool's

Now that she's almost 5 mos. old, she is able to fit the mary janes that I crocheted for her!

The mary janes I made were loosely based on a pattern found in this booklet. (I have trouble following directions!)

Here is the lovely Liliana modeling her mary janes!


Tabby Cat Hat and Fall Daisy Scarf

I'm in the process of packing and sorting and tossing and selling and donating stuff so that I can make the move from TX to PA.

Along the way, I have made several full car trips to Goodwill and have also donated three GIANT trash bags of YARN to two different local charities. One charity gives the yarn to 5th graders who are taught how to knit after school. They make items for preemies in the hospitals. It helps give the kids something positive to do while learning an awesome hobby. The charity donations are coordinated by Stacey who owns and runs The Knitting Nest in South Austin. I've been to The Knitting Nest a number of times. It's a great place with a wonderful selection and plenty of space to sit and stitch.

The second charity gives yarn to knitters and crocheters who make hats for cancer patients both in the hospital and at home. The donations for that charity are coordinated by Susan who owns and runs Yarnorama in Paige, TX. I hadn't been out to Paige before and I felt like such a city girl. It was a long drive and the town is very small. But, the shop is great. The selection is very extensive. There is plenty of space to sit and stitch as well as a cafe with coffee and treats. I was impressed & wanted to purchase all sorts of beautiful fiber... I had to remind myself that I was there to donate yarn - not accumulate more!

It's weird being somewhat stash-free. I did save a few skeins, but for the most part, I have no stash right now. I'm sure that before I know it, I will have a giant, ridiculous stash again... it feels great knowing that the yarn is going towards people who will really appreciate it and will be worked into projects that will brighten someone's day.

Anyway-- I had a few projects I wanted to finish before the move. I still have one more to go (it's about 3/4ths done)... and will post pictures when it is complete.


These are the projects that I finished this week...

Matching Tabby Cat Hats for Baby and Mama

My friend Audrey commissioned me to make her two hats. One for her sister and one for her sister's baby-to-be. The idea was to make them look like orange tabby cats - complete with cat ears - because her sister has been looking for an adult hat with ears for awhile now. The baby and mama hats would match -- and would be given at the baby shower.

I hunted around for the purrrrfect orange tabby yarn and found Vanna's Choice Tangerine Mist. Of course, after going to every Michaels and a few Hobby Lobbys in the area-- I still couldn't find this color. So Audrey ended up ordering it online for me--which worked out well.

Anyway-- eventually (in a month or so), I hope to post pictures of the mama and me coordinating hats. For now, here is a picture of me modeling the mama hat. The baby hat is identical (well, smaller, but same stitch and border) with the addition of earflaps and ties that look like cat tails. Both are my own design... but there are tons of cat hats out there in knit and crochet if you are looking for a good pattern.


Fall Daisy Scarf

My other project was for my friend Dana. She loves wearing warm oranges and yellows and I wanted to make her a scarf as a thank you gift. I bought some Vanna's Choice yarn in assorted fall colors from Michael's and used the daisy square that I made as an addition to my friend Kate's blanket for inspiration. The daisy square pattern can be found here, though, I did modify it some for this scarf. After I made several squares, I stitched them together and then did an improvised border in a shell stitch. The scarf is very long and thick and warm - I'm really happy with it. Once it was finished, I washed it with fabric softener and it feels amazing.

Here are the pictures -- they aren't awesome because the scarf isn't modeled, but will give you an idea of it. For the first picture taken in my cube, the scarf hadn't been washed & blocked yet... and yes, those are ends that had yet to be woven in... but I couldn't resist taking a picture of the progress. :o)


Thanks for looking! I'm not sure that I'll be posting again until after the big move.

Friday, July 18, 2008

Pictures of the Bridal Party Bags

I received the first pictures of the Bridal Party Bags for Devon's wedding in action!


Congrats to Devon and Dan!!!

Thursday, July 17, 2008

Patchwork Purse

Last night, my friend Audrey and I took a class at Craft-o-rama, the best place to take crafty classes in Austin! I've taken their tote bag (sewing 101) class and their Wrap Skirt Class. As evidenced by the... uh... THIRTEEN wrap skirts that I've made and posted on this blog, it's obvious that I enjoyed them!


We decided to take the Craft-O-Rama Patchwork Bag Class in which Hayley, the awesome & friendly owner of the store, teaches you a bag that she designed.


The class was very fun with a great group of women. We chatted and joked around whilst singing along to lots of fun 80's music.... oh and we made insanely cute bags!


I'm hoping to get pictures of Audrey's ridiculously fun bag - I'll update this post once I do.


For now, here's mine. Enjoy!

Felt so Good...

Back in May of 2006, I made my first felted bag. Actually, I haven't felted anything since then, so I guess it was also my most recent! I used Crochet Me's Pike Place Market Bag Pattern. I didn't actually finish it, though. And I never sent it to my mom. The reason is that when I tried to use yarn to sew on the handles, it didn't look very nice or neat. I tried handsewing with thread, but my stitches were hideous and not strong enough for the very thick, wool fabric.


So, I put it in a bag in a rack of my UFOs (unfinished objects), stored in the back of my closet. And there it sat. And sat.


A few days ago, I was sorting through some of my UFOs and stumbled on this bag.


*Lightbulb*


I now have a kicka** sewing machine!


So on Tuesday night, my long forgotten UFO turned into a beautiful Market Bag that my Mom can take with her to Weaver Street Market. I'll add more pictures once I have some, but for now...


Sorry for the long delay, Mom!

Tuesday, June 24, 2008

A Bag for Miriam


Last year for Miriam's birthday, I made her one of the cutest ami's I've ever made/designed, this hot pink ami monkey. The monkey was tragically stolen from her (really!?! seriously!?!?). Anyway, this year, I wanted to make her something special again. Her baby is off to college and a lot of things will be changing in the new year.

I made a bag for her using the same basic pattern as I used for the bridal test bag. But, I drew out the size and shape that I wanted it to be instead of using the pattern. I wanted it to be big, but with a longer main handle, since she likes bags with long handles. The size is hard to tell from these pictures, but the body of the bag is 15" across and the length of the longest handle from bag body to shoulder is 12"

It's a carryall tote that is washable. Since she recently picked up crochet, maybe it'll be a good tote for her larger projects!
Bag Open, Lining

Bag Open, Back


Bag Closed, Front

Monday, June 23, 2008

Skirts for Megan

This weekend, I turned my apartment into a one-woman, self-imposed sweatshop of sorts, to the chagrin of Beethoven and Lily-cat. They aren't quite sure what they did to deserve the neglect.
Really, they should just be thrilled that they don't have opposable thumbs. Because, while I slaved away, this is what Beethoven did:


Excuse the blur... I had to be quick like a ninja so as not to wake him.
Despite their best efforts to lie on the fabric while I was trying to cut it... bat at the loose threads, knock over the sewing box... and roll around on their backs begging for tummy rubs, I actually was able to accomplish what I set out to do.
I made 5 skirts for my sister Megan to wear to work or for fun or whatever. She originally asked me to make her some wrap skirts for a more professional, albeit fun look awhile back. Ok, months ago! It's been on my list for a long time. Since I am seeing her this weekend (YAY!), I decided now was the time.
On Thursday night, I cut the fabric and between Friday evening and Saturday night, I had them all sewn. They are all machine washable and I pre-washed them so she can wash them on hot if she needs to (with a toddler, she needs to not worry about that kind of stuff!).
Sunday, I made a bag for my friend Miriam. I'm still handstitching part of the handle. Once I'm finished, I'll post those pictures as well.
For now, here are the pictures of Megan's New Skirts. (Megan, if any of these don't suit your fancy, no worries... ) ;o) The skirts are modeled by my new best friend Yolanda.


Some cute and fun skirts just in time for summer! The fabrics were all from hobby lobby with the exception of the Amy Butler (second skirt pictured above) which was sweetly donated by my friend Nicole. The skirts will be ironed out and probably look a heck of a lot better on my sister (sorry Yolanda, but you don't have much in the way of hips).

I'll post pics of the bag for Miriam hopefully tomorrow.

Friday, May 16, 2008

7 Bridal Party Handbags

As I mentioned in an earlier post, I was asked to make some handbags for Devon's Bridal Party. She and Dan are getting married THIS WEEKEND which is exciting and wonderful. I'm super-happy for them!
I made the test bag (details in the above linked post) by shrinking the size of the handbag pattern from this book (bag is pictured on the cover). My good friend Nicole helped me out with the tough spots and the test bag ended up turning out very cute. So I figured that the actual bags would be no biggie.

whoops ;o)

Devon was sweet enough to send me the fabric that she wanted me to use -- which was a huge help so that I didn't have to stress over whether or not the bags would match the dresses properly. The fabric was beautiful - a textured, loosely woven silk with turquoise and pale green flowers and a satiny-off-white. The "wrong-side" of the fabric is the one that Devon needed me to use, though, since it matched the dresses better than the right side. Being a total beginner, I didn't know that this would pose much of a problem. But, alas, it made it a bit more difficult.

I went out and bought special needles for my machine that would sew silk and pinking shears.

The body of the bag looked fine, but the handles of the bags weren't quite as cooperative. With the small size of the handles and pulling them inside out and then sewing the tops, the loosely woven silk was fraying from the pressure. Apparently, using the wrong side was making it worse, as the textured silk was woven in such a way that the wrong side is the side that frays.

As sewing the handles together at the top is the last step, I saved this step for last in my assembly line. This means that I made all seven bags before I realized that the tops weren't looking so hot. And by not so hot, I mean, they were falling apart as I stitched them, and would probably get worse and fall completely apart just in time for the bridal party pictures.

Awesome, right?

Pictured below is the best out of the bunch, I apologize for the fuzziness of the picture. I was a bit crabby when I took it!


I stared at the 7 ghetto bags and tried to figure out a solution. This means that I wrote several whiny emails to Nicole begging her for advice. I thought about adding a bias tape seam around the handles and mouth of the bag... but the handles are so tiny in diameter, that it could end up looking even worse. Plus, bias tape is generally cotton, as Nicole reminded me. She suggested a french seam - which I knew how to do but didn't know that it had a name. But, unfortunately, the fraying was SO bad that there wasn't even enough fabric for it.

I looked at my 7 ghetto bags and was very sad - and worried about whether or not I could get them done in time for the wedding. Sure, I could send what I had to her, but they looked so pathetic looking. And let's face it, the pathetic-look doesn't generally go with the rest of the wedding decorations.

I started looking up hundreds of clutch bag patterns online and thought of just starting over with a new bag design.

At home one night, I was staring at the bags lying out on my coffee table, trying to will them to tell me what the solution was. While I was staring them down, I realized that the body of the bags was actually really cute. It was just the handles that were tragic and disasterous.

hmm.

I took my pattern cut out and cut off the handles. Then, I made the body of the bag only in the lining fabric, outer fabric, and batting. I took the handle pieces that I cut out and laid them on the fold of each of the fabrics and cut out long and short handles.

I sewed the handles into tubes and turned them right side out... I did a top stitch on the handles. Then, I sewed the handles into the tops of the bags.

Viola. No visible fraying.

For the other 6 bags I cheated and took the bags formerly known as Ghetto and cut off their handles. I made new tube handles for them and sewed them in.


Anyway, I hope that the bride and the bridal party are happy with the results. It was a great learning experience for me & I hope everyone likes them. Eventually, I'm hoping to get a few pictures of the girls carrying them to post up.

In other news, I spent last week in Seattle with family. It was great to hang out and veg with family and I got to meet my newest niece. Of course, all aunties think their nieces and nephews are brilliant--- but get this, my newest niece is already so very alert and actually smiles when you laugh. So sweet. She's so very interactive for a wee lil one month old!

It was great to get away. My allergies actually were completely clear the entire time I was there, which was a wonderful and welcome change.

Anyway, for the future nursery, here are some letters for decoration that I crafted. Just got the letters from Hobby Lobby and modge-podged pretty scrapbooking paper that I cut out to them. Cute and easy baby project-- if you are looking for a good gift ;o)

Friday, April 11, 2008

Duke's Baby Chucks


I made another pair of baby chucks this week for my friend Kimsey's brand new nephew Duke. I actually decided to make the soles of the booties differently than I made the other baby chucks I winged a few weeks ago. The reason why is that I was using a different yarn, which was softer, thinner, and makes a less sturdy fabric. The yarn I was using was from mill ends in a baby chennile. Supersoft, and perfect for baby booties, but just not as thick as worsted weight yarn.


So, I made the sole in rounds and added the toe. Then, I did the same upper (or hi-top) as I did before. I made the tongue of the shoe a little longer and more pronounced. Then, I decided to add a star logo like the all stars have. I made it by stitching in black 5 sc in the round and then a round of hdc in white. Then, I sewed the circle down to the shoe. It's kind of puffy (stuffed with the ends), but I like it.


Hooray for Auntie Kimsey!


Friday, April 04, 2008

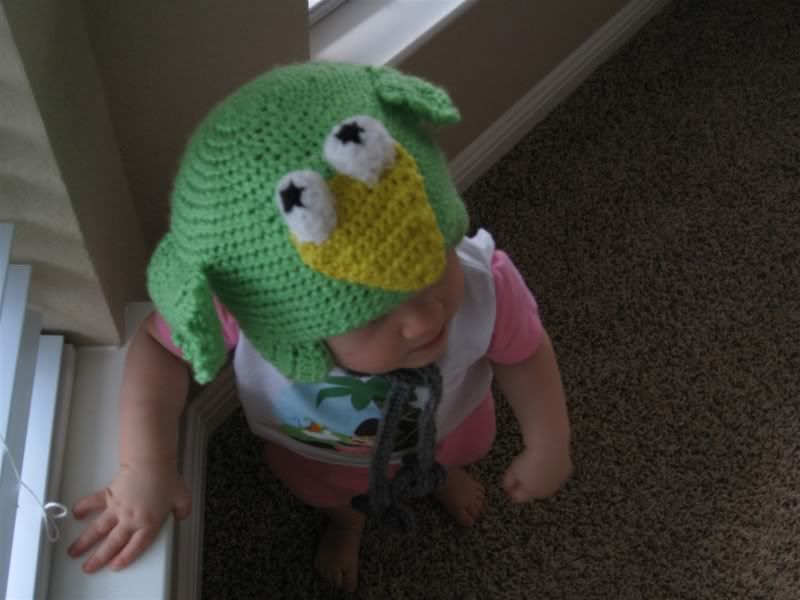
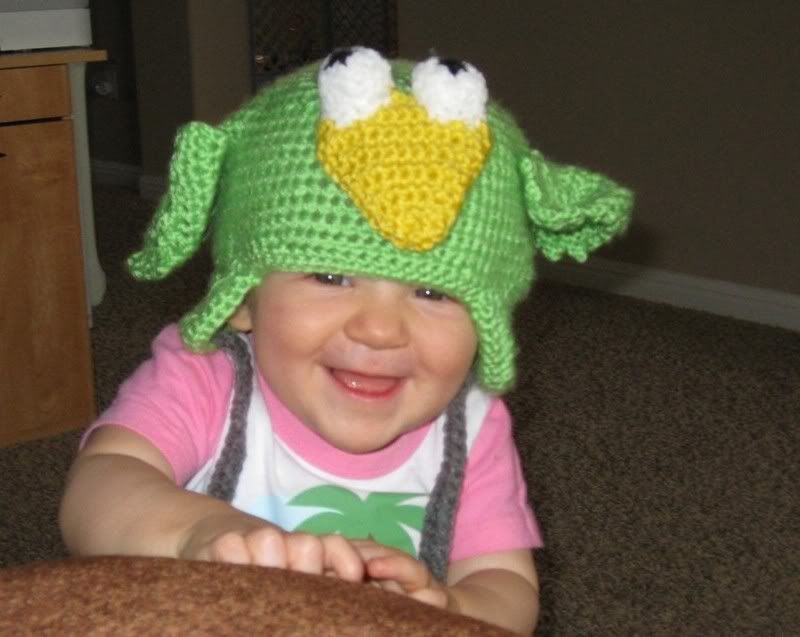
LaRusso Lovebird Hat

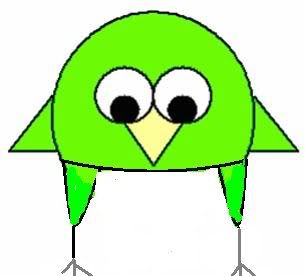
Whilst measuring the noggin of one of my coworkers so that his wife could crochet him a hat with my help, another coworker asked if I'd be willing to make a custom hat for his baby. Of course, I love making baby stuff, but I was especially excited when he told me that he and his wife wanted a hat that looked like their lovebird. I thought it would be an interesting challenge and a lot of fun.

Together, we came up with this design of what the hat could look like.

The biggest concerns that they had were that I made 4 gray toes on the bird (to match their lovebird), included wings, and found a very bright green. Luckily, I still had some Caron Simply Soft - Brites in Limelight.


I did the main hat in half double crochet, with earflaps. Sizing-wise, the hat is currently a few sizes to big for her, as we're hoping that she can wear it comfortably next winter. Woven hats during an Austin Summer just don't work that well. The wings were made the same manner as the ear flaps, but larger and with a picot edge. The ties were done in long rows of half double crochet in a Red Heart Charcoal. The toes were made out of "X's" made also in half double. And the beak and the eyes were done in scraps of yarn in single crochet.


Here is the Lovely Lady in Her LaRusso Lovebird Hat
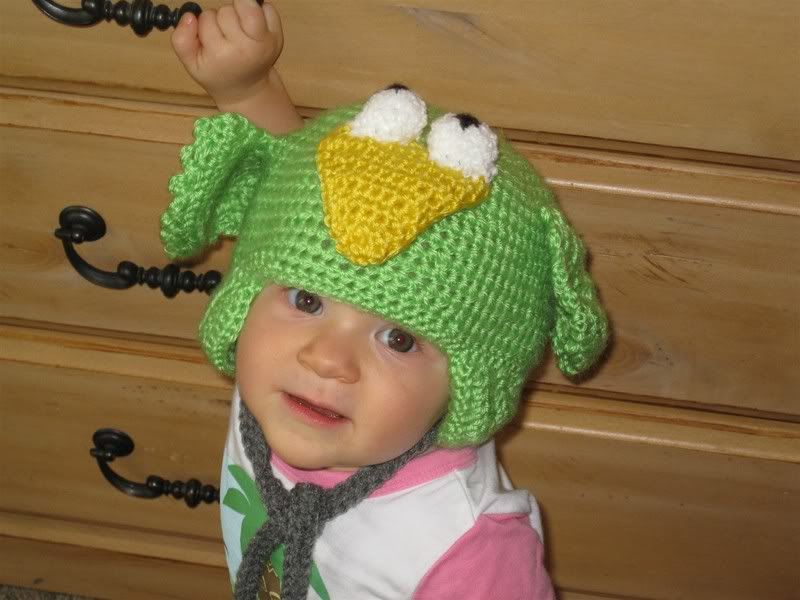


Isn't she adorable?
Monday, March 31, 2008

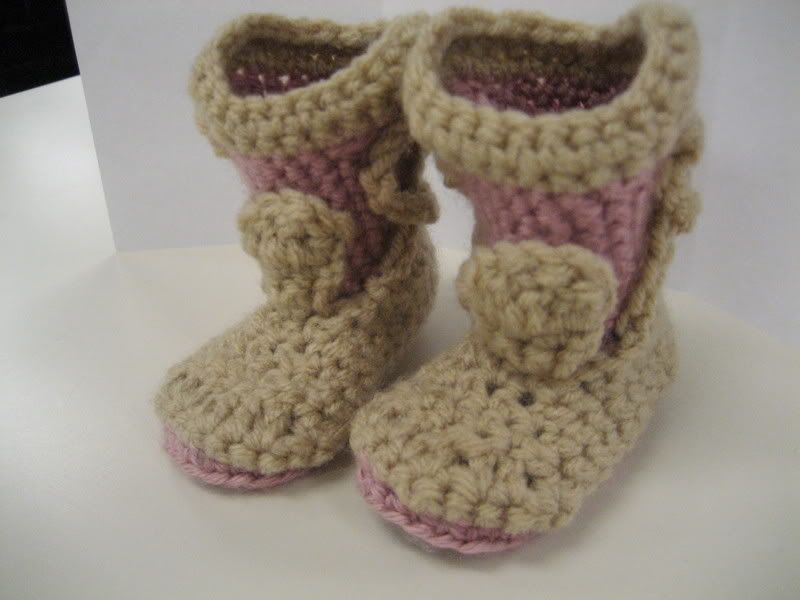
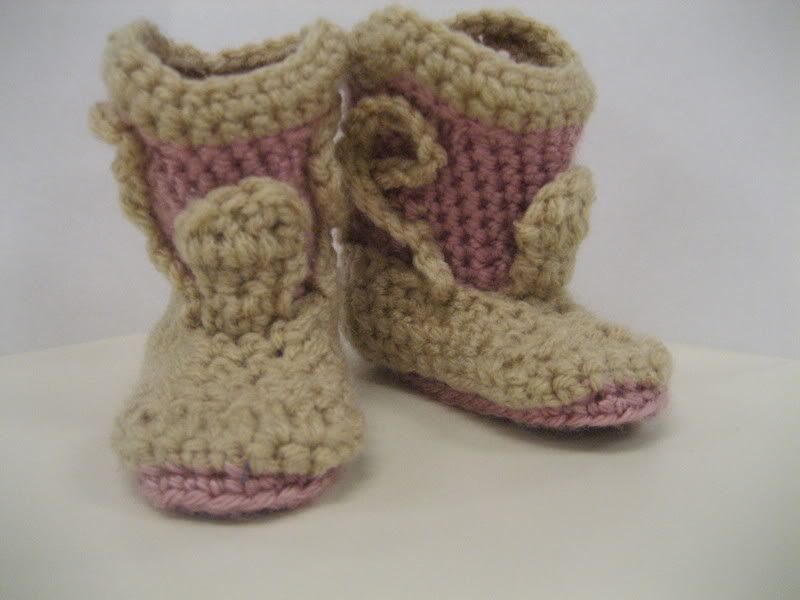
Cowgirl Booties

My friend & coworker Justin saw the cowboy booties that I made for a silent auction and asked if could make a pair for his niece-to-be. She is due in a few weeks, so I made them this weekend in Caron Simply Soft Pink and Red Heart Super Saver Buff. The Cowboy Booties pattern is one of the very few patterns that I actually follow without changing it up. Actually, maybe the only one! The booties are sized for a newborn and super-cute!


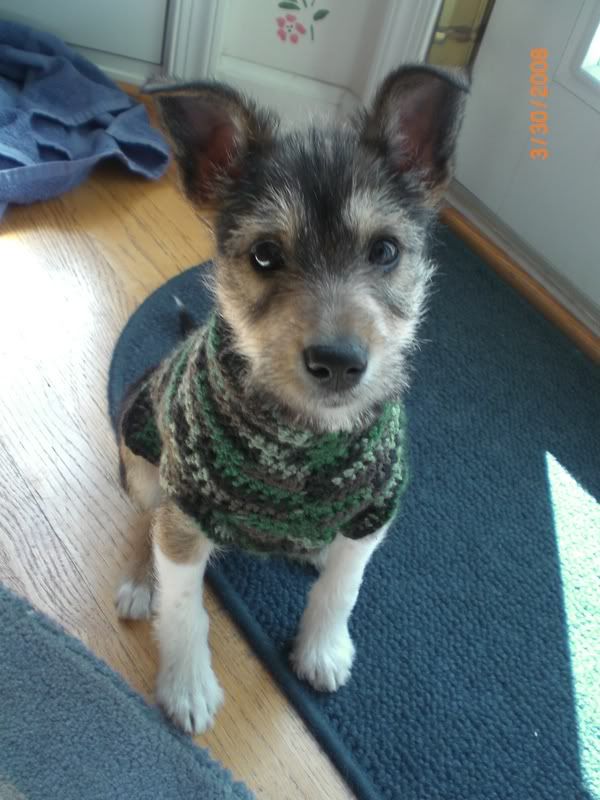
In other news, the Wags and Whiskers Annual Dinner Auction to Benefit the Humane League of Lancaster County was held on Saturday. It was a huge success and everyone had a great time. This morning, my sister sent me this adorable picture of the lucky recipient of the GI Joe dog sweater that I donated. His name is Mickey, isn't he adorable? ... er, I mean, isn't he super-tough in his camo?

Tuesday, March 25, 2008

Tough Guy - Sewn Dog Jacket

A friend of mine is living with his sister and her two toy dogs that she loves to dress. The great thing is that the dogs both love to wear clothes and come running happily every time she pulls out an outfit for them. He knew that I was getting into sewing jackets and asked me to make a "tough guy" jacket for the male dog of the pair, since apparently, some of his current outfits are lacking a bit of testosterone. Hopefully, soon, I'll have pictures of this jacket modeled... but for now, here it is. Of course, Lily-Cat loves photo shoots and was desperate to get in every shot. So, the paw here and there is her trying to add value, glitz, and glamour to the frame.

Monday, March 24, 2008

On the Catwalk...


My sister received my contributions to the Wags and Whiskers Annual Dinner Auction to benefit the Humane League of Lancaster County. She even took some pictures of a few of the sweaters on some "dogs". So, thanks to her, you can have a better idea of what these dog sweaters will look like when their future owner struts their stuff in them.
Fiesta Print with Sage Trim

GI Joe

He's an American Hero, you know....

Barbie and GI Joe...

or Miss Piggy since she obviously is begging for attention...

Enjoy!

Tuesday, March 18, 2008

Test Bag for Devon's Bridal Party


Lately, I have been taking on some projects for my family and a few friends to help them out while gaining some sewing skillz. The latest one is for my younger sister's bff - Devon - and her bridal party. I'm going to make small bags for her bridal party that coordinate with their bridesmaids dresses. The original plan was to do just fun bags for them for the bachelorette party, but time wasn't on our side.

Really, though, it's actually kind of exciting for me to be helping out with the bags. Bridgid and Devon have been friends for years and years. When they first became friends, I was their driver to many a freshman year event. So, I hung out with them a lot. Back then, I also met her soon-to-be husband... since Devon is actually marrying her high school sweetheart. I know, I didn't know that actually happened in real life, either :o)

Anyway, I'm thrilled for Devon and very happy to help out with her wedding. So, hopefully the bags don't suck.

Since I'm very green at sewing, I picked a pattern that was from a beginner book that teaches the basics. Keywords: Beginner and Basics. Even though it was supposed to be pretty simple, I enlisted the help of my friend Nicole who is an expert sew-girl. She studied costume design at UT and actually understands patterns (something that is completely lost on me).

I've been teaching her crochet, so it was kind of a trade off of sorts. And let's face it, she gets to hang out with moi, which is a privilege in and of itself. ;)

I helped her out with her and her boy's theme party costumes --they were to be GI Joes for an 80's party. She had bought the camo pants and black shirts and we ironed on a GI Joe graphic to the front of the shirts. I was there to make sure that it was somewhat centered and straight.

Eventually, after procrastinating, we started on the "Beginner" and "Basic" bag.

If Nicole had not been there, I probably would have given up and tried a different pattern.

There were a couple of steps that were really confusing... and a few that are just plain annoying.

Now that I know what to do, the next bags will be much easier... it's just that there were a few things on the first bag that I coulda woulda shoulda done differently. Also, the bags for Devon's wedding will be with a thinner, smoother material, so it will be easier to do some of the steps.

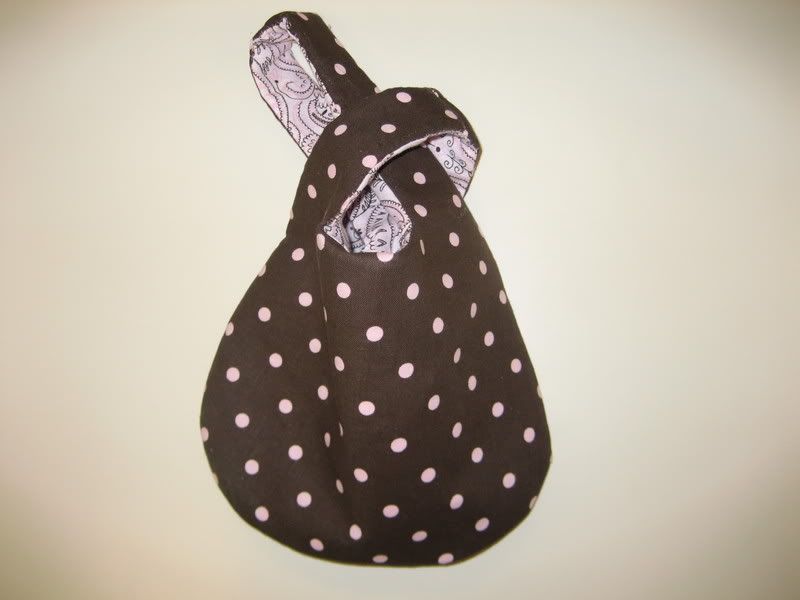
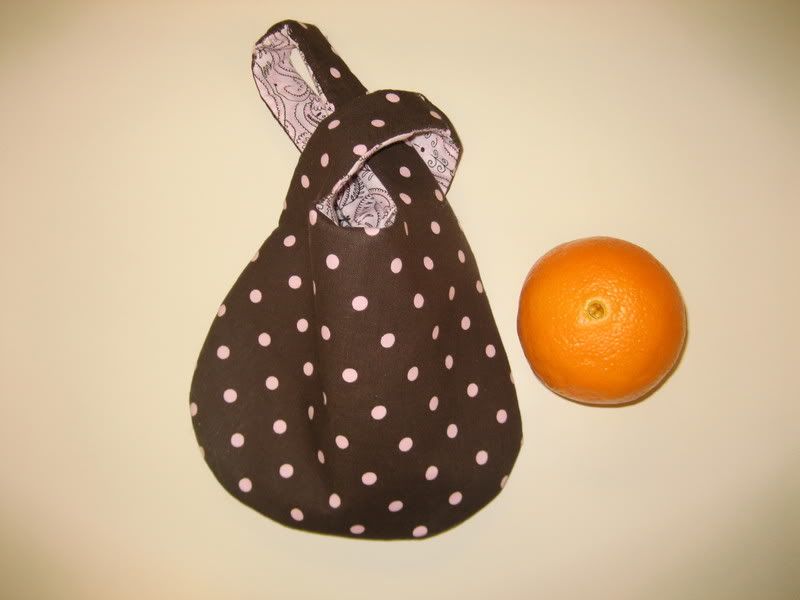
Anyway, the bag is still cute, but it did take some time and elbow grease. We made it much smaller than the original... and I think it's tres cute. The small orange is pictured to show approximate size.

Closed bag.

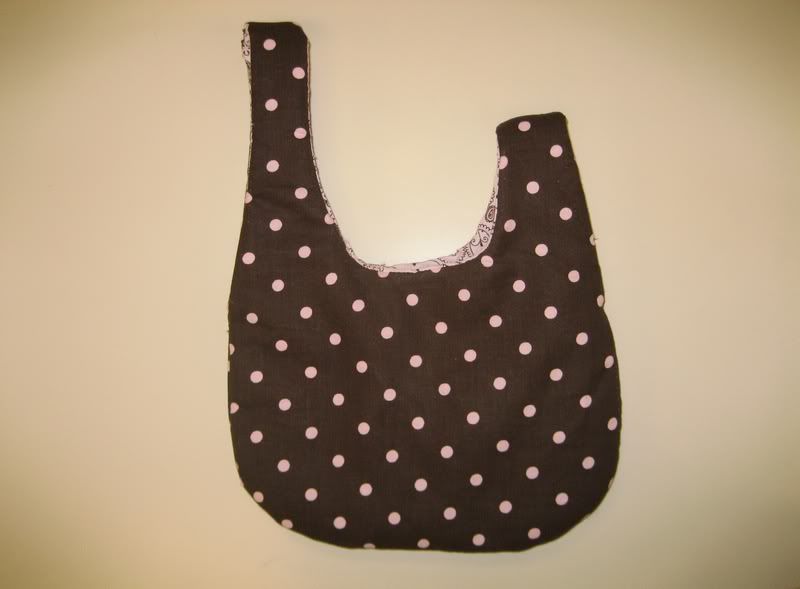
Bag open, lying flat, back.


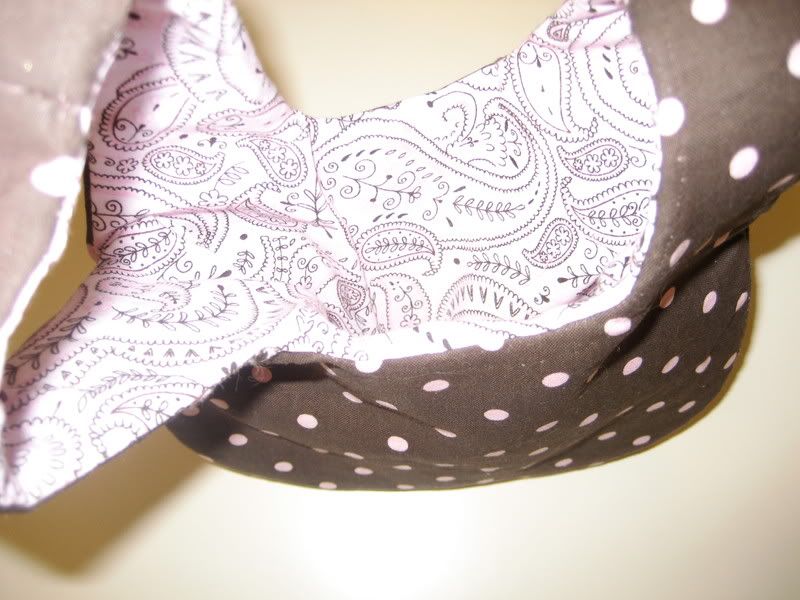
Open Bag, Lining Exposed.